Why you should try Google Apps Script

Plus the learning curve is almost flat.
Hello World
All you need to start is a Google Account, you can do it in 3 quick steps, let me show you:
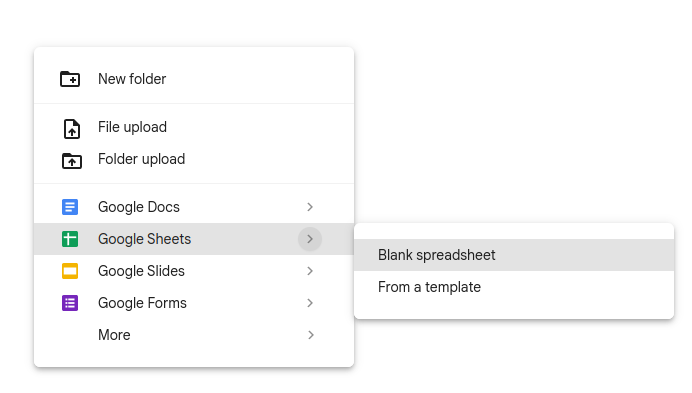
Step 1: Create a new Google Sheets file on your Google Drive
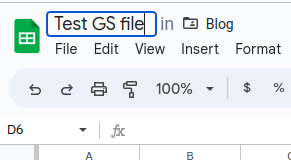
Google Drive will give the default name "Untitled spreadsheet" to your spreadsheet. If you want to change the name (optional) just click on the name and type the new name.
Step 2: Create a new Google Apps Script project
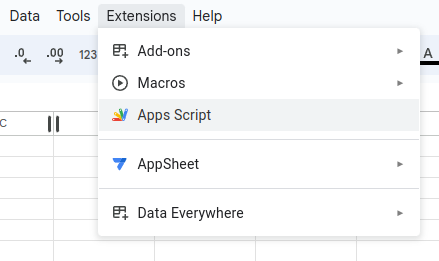
In the menu, go to "Extensions" and select "Apps Script".
A new tab will be open with the Google Apps Script project. Again, it has the default name "Untitled project" and you can rename it (recommended) by clicking on it.
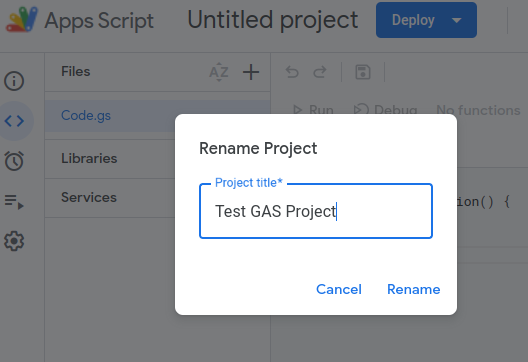
Once you rename it - it will be saved.
Step 3: Write some code
A brand new project has a single file named "Code.gs". Copy and paste this code into it:
function onOpen() {
  SpreadsheetApp.getUi()
    .createMenu("My Menu")
    .addItem("Record User", "recordUser")
    .addToUi();
}

function recordUser() {
  SpreadsheetApp
    .getActiveSheet()
    .appendRow([
      new Date(),
      Session.getActiveUser().getEmail(),
      "was here",
    ]);
}
It will look like this:
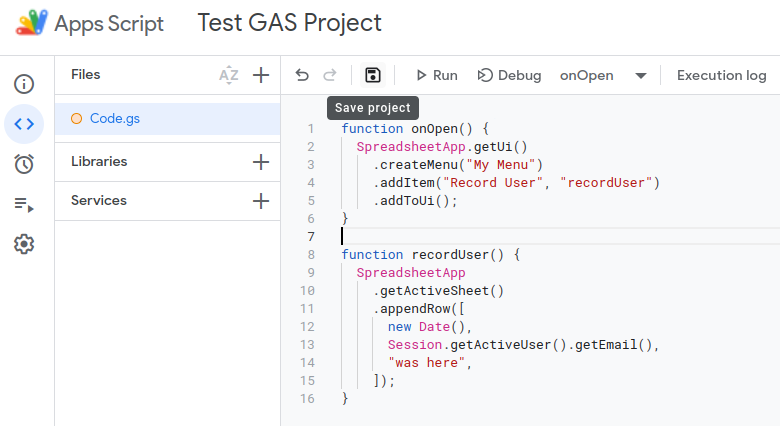
When the user clicks on a menu item, the code will append a row to the active sheet: current date and time, user email and "was here" string.
Don't forget to click the "Save" icon. And that's it, you are done! I did it one more time with a ⏱ and it took me 50 seconds. Let's play with it.
Play
Step 1: Refresh/Reload
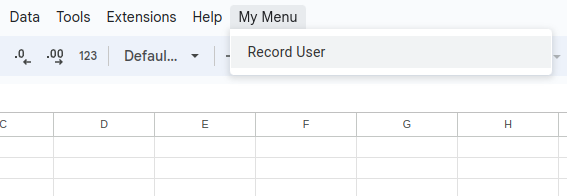
Now let's close the GAS tab and go back to GS file. Hit Refresh or Reload button in your browser. Once the file reloads, you will see the new menu, "My Menu":
Step 2: Authorize
Now just click on the "Record User" menu item to run the code.
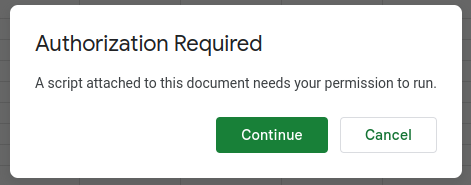
But not so fast! You have to authorize the code first (expand the following block to see the details).
Authorization Process Details
Many of you know how to do this. For those who don't, I tried to write a short explanation, but I ended up with the long one. So here I'll write a summary:
- You (and the people you shared the GS file with) have to say "I agree" to the code changing the GS file.
- Depending on the Google Account you use (regular Gmail or Google Workspace account) the code (application) may or may not be verified by Google: steps may be different. Follow the screenshots here, you may read the entire article too.
- You will know that the process is finished once you get to the "Allow" button and click on it.
- You will get a notification email, if you want to revoke the consent just visit your account permissions.
This topic is more complex than this summary, if you want to know more about authorization "how" and "why" - feel free to ask me.
The first time you click on the "Record User", you will authorize the code (app), nothing will be appended to the GS file. The first run does the authorization only, not the execution. Click on the "Record User" again.
Step 3: Share
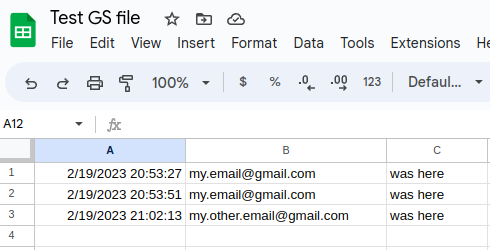
You will get something like this
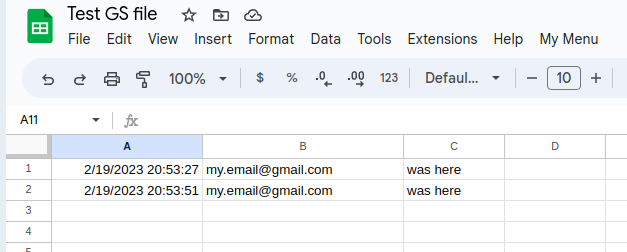
If you share your file with another Google Account: they will have to Authorize the code first, after that you will get something like this:
Let's take a step back and look: in several minutes we made a custom menu that does something. It's a kind of magic. 🪄
Step 4: Improve
We have a menu for the users to select and get their name and the date written to Google Sheets, like people write on jail walls or kids in school. Hmm, when I think about it, for some people school can fill like... OK, let's move on.
If we select another sheet and fire the menu - it will append a row to the selected sheet. We used SpreadsheetApp.getActiveSheet() method. We don't want that, we want to target the specific sheet, plus we want to prepare it with the column headers:
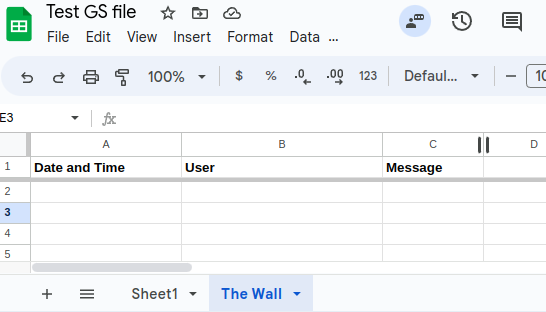
Now we want to get the current file (spreadsheet) and then get the specific sheet by name:
function onOpen() {
  SpreadsheetApp.getUi()
    .createMenu("My Menu")
    .addItem("Record User", "recordUser")
    .addToUi();
}

function recordUser() {
  SpreadsheetApp
    .getActiveSpreadsheet()
    .getSheetByName("The Wall")
    .appendRow([
      new Date(),
      Session.getActiveUser().getEmail(),
      "was here",
    ]);
}
Code does what we want, no matter which sheet is active - it always appends to the appropriate sheet.
The Learning Curve
It's very easy to get started with Google Apps Script. On most of the "getting started" topics you can simply google "how to add custom menu" or "how to append row". You will find a lot of answers and it will lead you to the documentation pages. Here we used:
- onOpen trigger
- Class SpreadsheetApp methods getActiveSheet and getActiveSpreadsheet
- Class Spreadsheet method getSheetByName
- Class Sheet method appendRow
- Class Session method getActiveUser
- Class User method getEmail
The hierarchy of classes follows the expectations: SpreadsheetApp is the starting point for working with spreadsheets. Then you have the Spreadsheet, Sheet, Range etc.
When you are on the Spreadsheet level, and you call the method that returns the Sheet - in the return section you will have the link to the Sheet class.
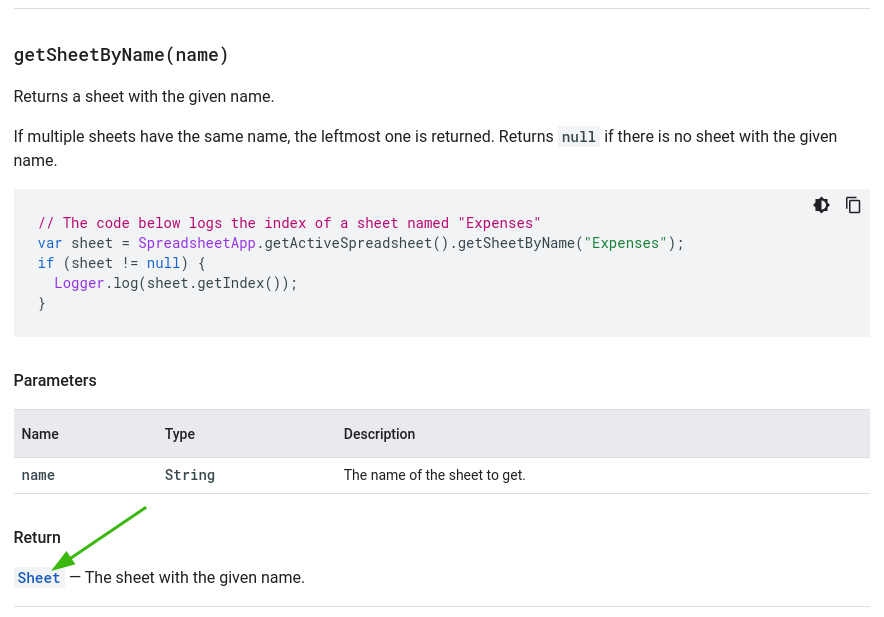
Then you can follow that link and move on: see what Sheet class methods you can use in your next step.
Furthermore, Google Apps Script is JavaScript, so for language-specific questions: you can find almost anything. Old and popular languages like JavaScript usually have a huge ecosystem and knowledge base.
Google Apps Script is a really good place to start your coding journey, even if you never coded before. A lot of people started recording macros in Google Sheets and then got into coding as the next logical step.
If you are already a developer, you will probably get into it even faster, especially if you have experience with JavaScript.
Questions, Corrections and Suggestions are appreciated: contact me.
